Taste the City
A booking app for curated tastings throughout Canada.
Design tools: Figma & Adobe Illustrator
User types: Taster, Restaurant, Admin
Tech stack: Ruby on Rails backend | Next.js frontend
Taste the City Overview
Taste the City came to us as an idea and a rough sketch on paper brought by our wonderful client Joanna, the CEO of Taste the City. We guided Joanna through the design and development process step by step so she could make all the important decisions with as much transparency as possible.
We crafted a design package full of mockups and a clickable prototype and then we coded it all within a month. We even helped with branding and crafted their word mark.
We focused on a high-value MVP consisting of the most important features to hit the market. This got her to market quickly and with much less expense. Joanna was able to receive real user feedback right away and we rapidly iterated on the product and started adding more features based on user needs and requests.
Tasting Listings
When users first enter the app, they are prompted to select a city to start viewing tastings. Users can switch cities at any time from the main page. Each city offers listings for users to browse. Each card can be clicked on to view further details about the tasting.
Tasting Details page
The Tasting detail page displays a description, image gallery, tasting details like locations and duration and reservation booking. Dietary restrictions are communicated to the restaurant to ensure participants get the correct type of dish.
As soon as a booking is made, the user is emailed and texted a confirmation.
Taste the City uses a series of scheduled texts to guide tasters from location to location. Tasters get a reminder 24 hours in advance. Then a heads up 1 hour in advance. The remainder of the texts are based on the number of locations, walking time, and duration of each location. This info is entered by the admin in the back end (pictures of this below!).
Restaurant dashboard
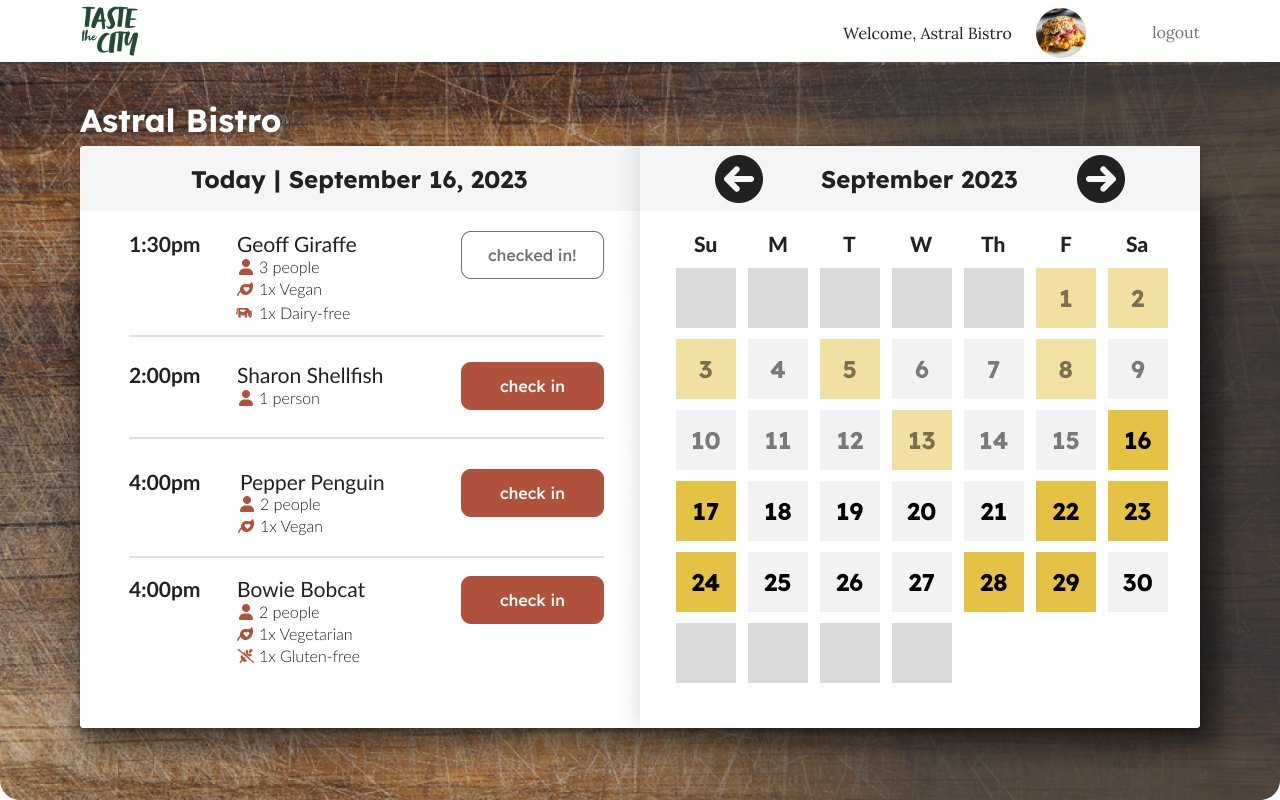
As soon as bookings are made, the reservation time for each location is calculated and updated on the restaurant’s front end. Each reservation includes the time, name, size of party, and dietary restrictions. When tasters arrive the restaurant verifies a 4-digit automatically generated code (sent to the taster via text) and checks them in.
Admin panel | Tastings table
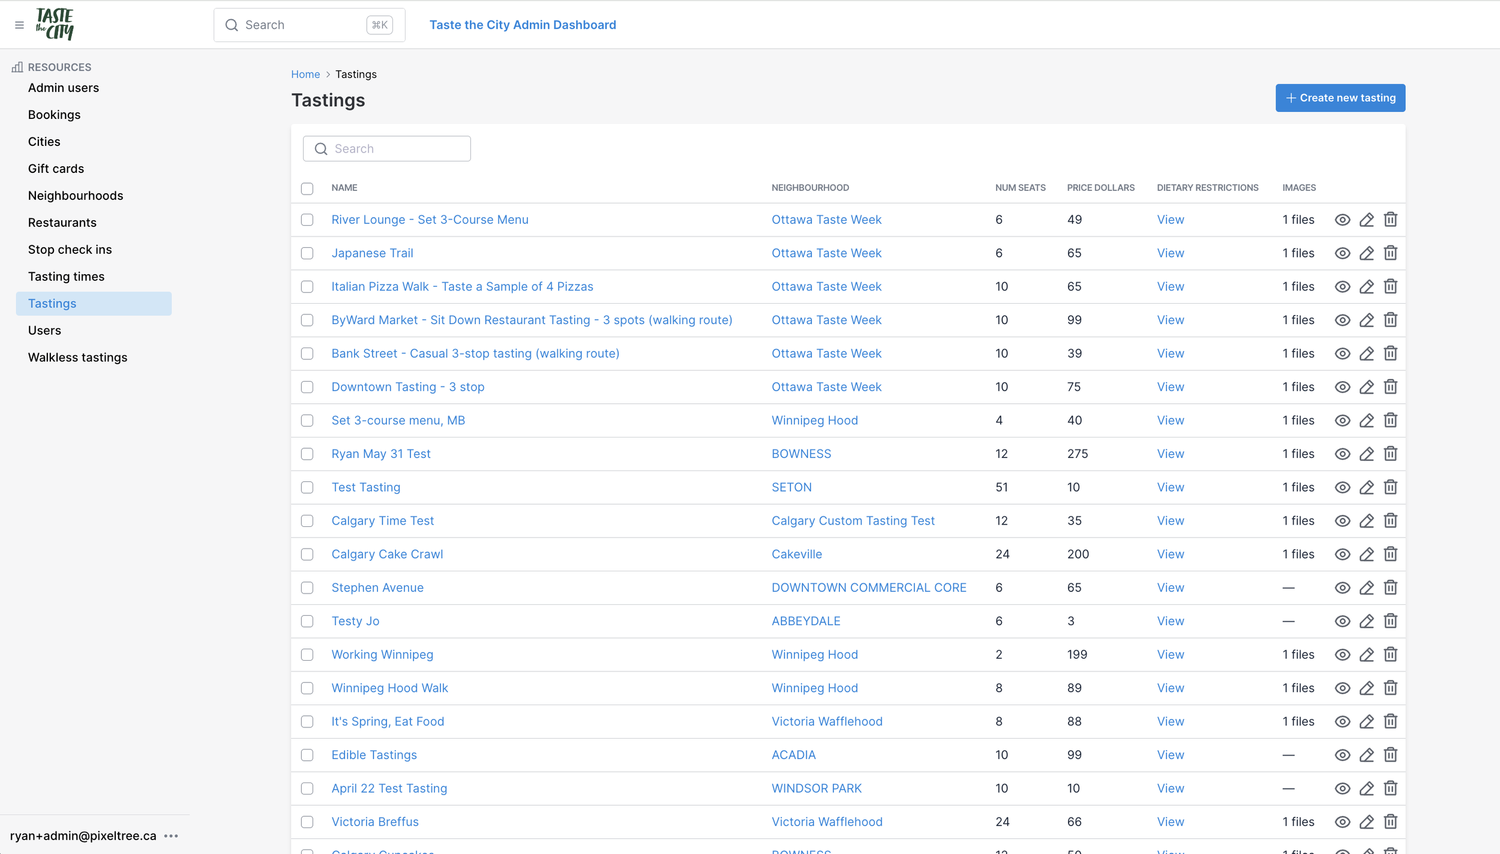
For the admin panel, we typically use a third-party platform called Avo. This is the Tastings page which shows all the tastings in the system. From here you can create a new tasting.
Admin panel | Create new tasting
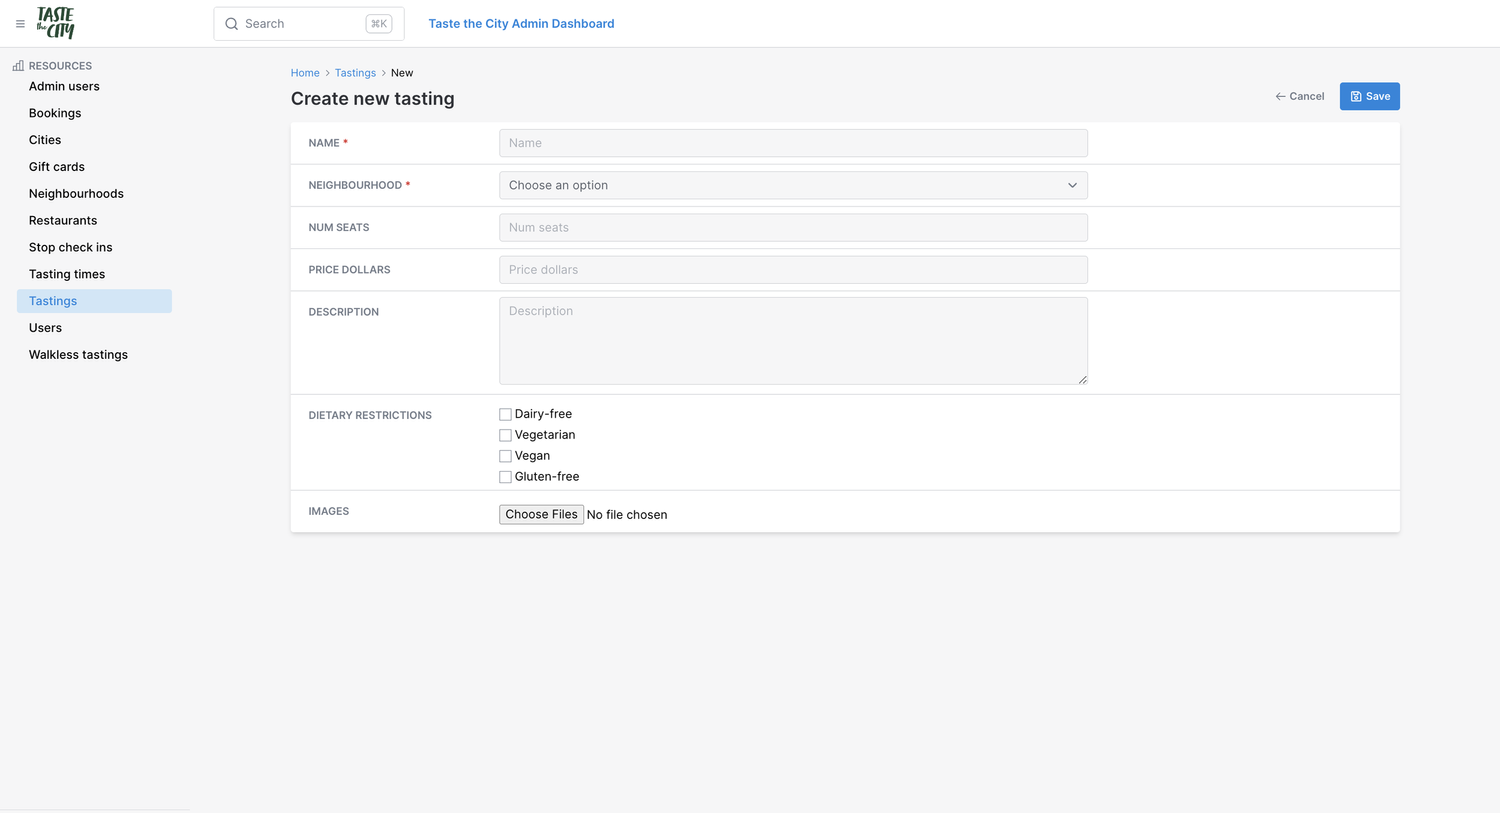
Creating a new tasting first involves creating some base details like name, description, cost, and seats.
Admin panel | Compose tastings
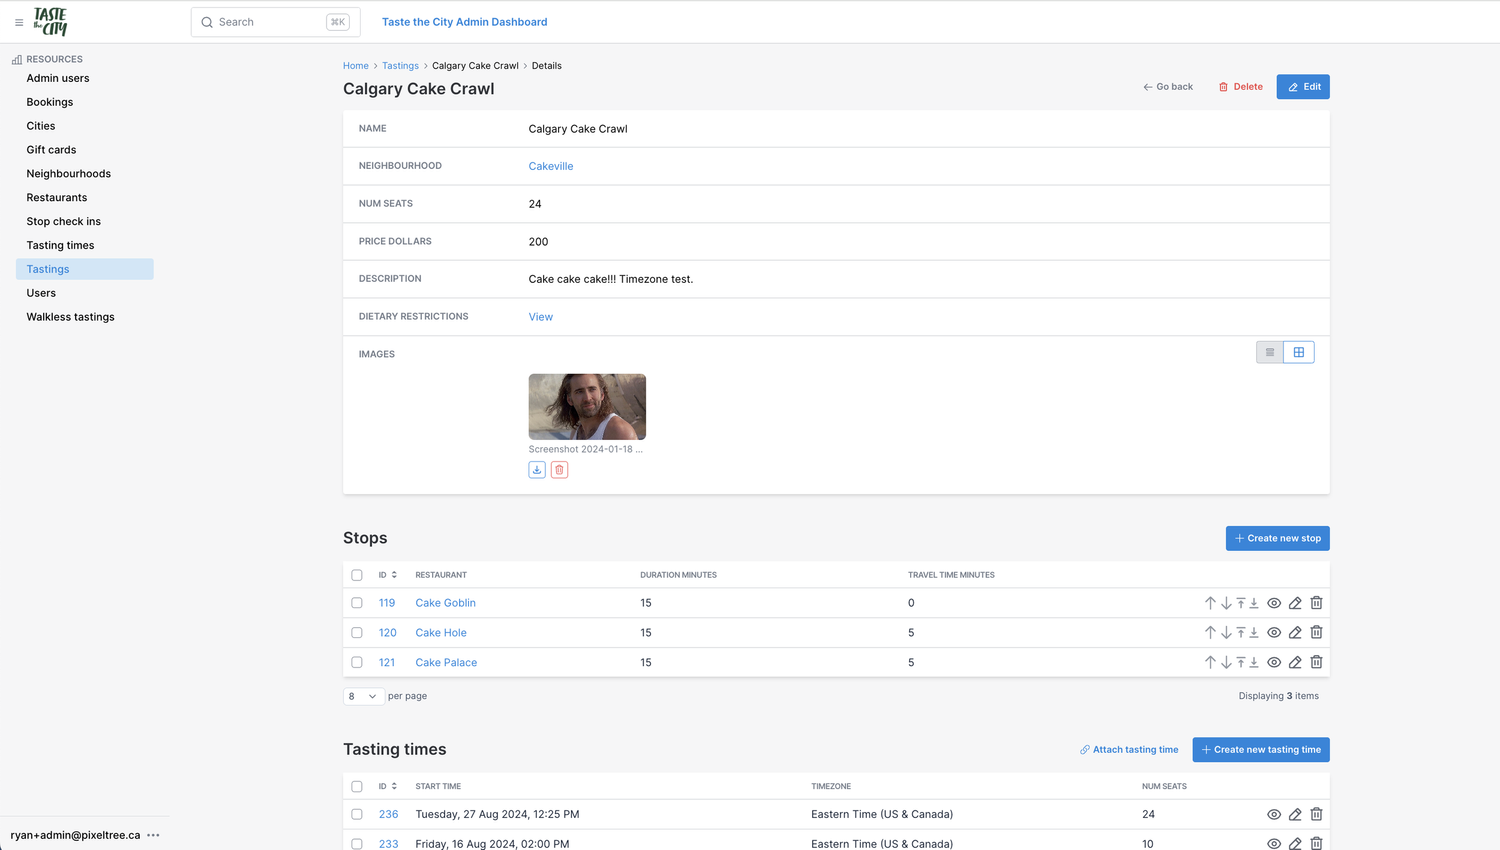
Once a base tasting is create, the admin will add stops, which are restaurants that have been added to the system. Duration and travel time minutes are set here which calculates the reservation times for the participating restaurants. The admin also creates tasting times that can be booked on the front end.
Tasting texts
A core feature of Taste the City is the guided texts sent to the tasters and includes:
Thank you for booking with booking code
24 hour reminder text
30 minute reminder
Descriptive text per restaurant with map - scheduled based on time per restaurant
We hope you enjoyed your Tasting! with survey
Walkess tastings are similar except that there is no map per stop since the tasting takes place at a single location. Texts also describe each “stop” as a “dish” to recontextualize the term.


